
Common Mistakes to Avoid During Car Paint Protection Film Installation
Paint Protection Film (PPF) installation is an increasingly popular service among car owners who want to protect their vehicle's exterior from road hazards and environmental damage. While PPF offers numerous benefits, such as self-healing properties and UV resistance, improper installation can lead to disappointing results. Avoiding common mistakes during the installation process is essential to ensuring the film provides optimal protection and maintains the vehicle’s aesthetic appeal.
Preparing Your Car for PPF Installation
To begin, the very first step in preparing your car for Paint Protection Film (PPF) installation involves washing it thoroughly. Use a pH neutral car shampoo to effectively remove all dirt, grime, and other contaminants. It's crucial to pay attention to areas such as the wheel arches and undersides, where dirt can frequently persist and lead to problems when applying the film.
Once your car is sparkling clean, the next crucial action involves inspecting the paintwork meticulously for any imperfections.
During this inspection process, look closely for chips on the paint surface. These flaws might seem minor at first but can significantly affect how well the PPF adheres to the vehicle. Addressing these issues prior to installation ensures that your film will not only look excellent but also stay properly adhered over time; this could mean touching up paintwork or even using a specialized polishing technique to correct these blemishes.
Once you've addressed the surface imperfections, it's time to completely dry your freshly washed vehicle.
To avoid scratching the freshly inspected paintwork, gently dry the car using soft microfiber towels. It's crucial to pay close attention to crevices and hidden spots where water might linger, as even a small amount of trapped moisture can cause bubbles under the film during application.
Finally, we arrive at a key step in establishing an optimal working surface for your PPF application: removing old wax and sealants.
Use a specific automotive-grade wax remover in this step to remove any wax or sealants from your vehicle's surface. By creating an entirely clean base for your PPF application, you're eliminating potential barriers that could compromise adhesion. Just like painting, having a smooth and perfectly prepped surface ensures that your final exterior looks seamless and polished.
Only after completing these steps will your vehicle be truly ready for the next crucial phase, which focuses on how to effectively remove cleaning residues and dust before applying the protective film.
Cleaning and Dust Removal Tips
Cleanliness is critical to the PPF application process. We cannot overstate the fact that even the smallest dust particles can cause significant issues with adhesion and clarity. Therefore, familiarity with effective cleaning tools and techniques is essential to achieving a perfect install.
The importance of using microfiber towels
Utilizing microfiber towels offers numerous advantages when it comes to dust removal. Instead of just moving dust particles around, these towels attract and hold onto them. While you’re wiping down your car’s surface, you’re effectively lifting away contaminants from the paint without causing further smudges. Furthermore, microfiber towels are washable and reusable, making them a sustainable choice for your cleaning routine.
Air Compressors: Their Role
Incorporating an air compressor into your prep process can significantly enhance your ability to remove stubborn dirt and debris. By directing bursts of air into tight spaces, such as around headlights and grille sections, the compressor dislodges particles that might otherwise remain hidden. However, it's essential to handle the compressor with care; maintain a safe distance from the vehicle's surface to prevent potential damage. Holding the nozzle too close may lead to unwanted shifts in paint quality.
Finally, wipe down
After you've successfully blown away dust and debris, it’s time for a meticulous final wipedown. Grab a lint-free cloth dampened with an alcohol-based cleaner; this step is crucial as it removes any oils or leftover contaminants that may interfere with PPF adhesion. The alcohol helps evaporate quickly, ensuring that the surface remains dry and clean for optimal film application. Make sure to gently rub the areas where you will apply PPF.
With cleanliness established, you're now well-prepared to learn the specific steps necessary for ensuring a successful installation.
Proper Surface Preparation Steps

To ensure your PPF adheres effectively and lasts, meticulous attention to surface preparation is essential. Each phase contributes to creating an ideal surface, free of contaminants and imperfections that can compromise the installation.
Step 1: Use a clay bar
Starting with a clay bar can seem like an added step, but it’s one of the most effective methods for ensuring that your car's paint surface is pristine. The clay bar removes embedded contaminants such as tree sap, industrial fallout, or even tiny particles of rust that car washes often miss. When you run the clay bar over the paint correctly, it feels smooth as butter. It’s almost like sanding down a piece of wood before painting—this smoothing out creates an ideal canvas for your PPF to adhere to.
Step II: Wipe down alcohol
Once your paint surface has been clay barred, the next crucial step is to give it an alcohol wipedown using isopropyl alcohol. The purpose of this step is simple: you want to eliminate any remaining oils or residues that may hinder adhesion. Think of it as washing and drying your hands before applying glue. Any leftover moisture or grease could compromise the bond between the PPF and your vehicle's paint.
Make sure to use a clean microfiber cloth for this task; old towels can carry their own residue or dirt that you've just spent time cleaning away. Lightly dampen the cloth with the alcohol solution, taking care not to soak it through, and gently wipe across all surfaces the film will cover, especially the areas where the edges will meet. Pay special attention to corners and seams, which are common points of failure if not properly prepared.
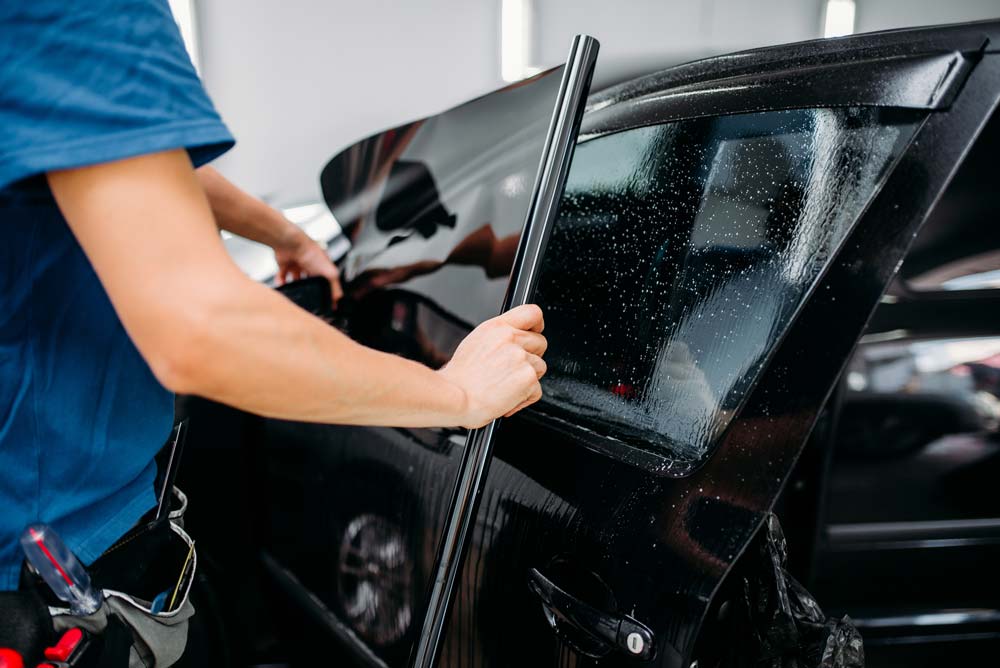
Step III: Tape Off Sensitive Areas
Finally, applying painter’s tape to sensitive areas before starting your installation serves two important purposes. First, it provides a clear boundary for where the PPF should go, preventing misalignment that can lead to visible seams or poor coverage. Second, it protects components such as trim or decals from accidental application of adhesive or film—you certainly don’t want to risk damaging those areas during installation!
Take your time when taping off; precision here makes all the difference in achieving clean lines and avoiding regret later on when you have a film misaligned or stuck in places you didn’t intend it to be.
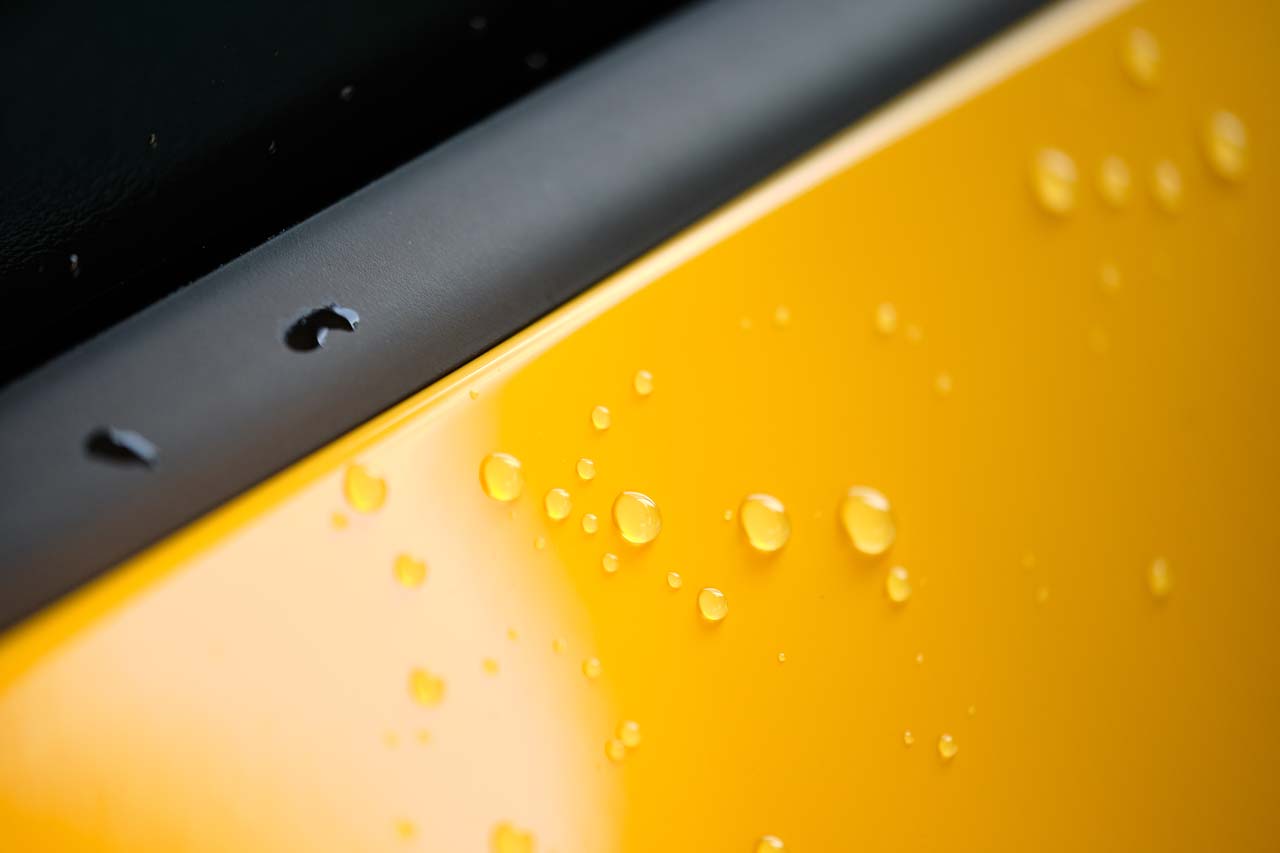
Avoiding Bubbles During Application
Bubbles are not just unsightly; they can also compromise the functionality of your paint protection film (PPF). Fortunately, there are effective strategies to mitigate this issue right from the start of your installation process. First, it's crucial to incorporate a slip solution.
Step I: Use a Slip Solution
To make your installation smoother, mix a solution of soapy water in a spray bottle—just a few drops of soap in warm water will do. Before application, spray generously on both the PPF and the surface of your vehicle. This creates a lubricated environment that eases positioning and realignment. Think of it as giving your film a cozy place to settle, allowing you to adjust it as needed without excessive friction.
However, applying the slip solution isn’t the only step—using the right tool for air removal is essential.
Step II: Squeegee Technique
Next, employ a high-quality squeegee for any trapped air or moisture beneath the film. Yet, this is where many enthusiasts might go wrong: pressure matters. Use light, even pressure, rather than forceful strokes to push out air bubbles. Imagine running your hand over a balloon; too much pressure and it pops—too little doesn’t create enough tension to smooth things out. To effectively remove trapped air, keep it gentle but firm as you work from the center outwards. Once you've tackled that part, maintaining control during application becomes increasingly important.
Step III: Work in Sections
Finally, it's beneficial to break your installation into manageable sections. Smaller areas allow you to focus better on eliminating potential problems, like bubbles. Just remember to slightly overlap your strokes with each squeegee motion; this technique ensures that no bubble accidentally remains trapped underneath the film. Think of painting a wall—if you roll too quickly without overlapping, you'll notice streaks later on. The same principle applies here.
By following these targeted strategies, you're setting yourself up for success by greatly reducing the risk of bubbles forming during application. This proactive approach not only conserves your time but also safeguards your PPF investment, effectively preserving both aesthetics and performance.
Ensuring a strong adhesive bond
The adhesive bond is what keeps the Paint Protection Film (PPF) securely in place, shielding your vehicle from environmental elements. A solid bond can be the difference between a flawless application and peeling film down the road. Prepping the surface before installation plays a crucial role in achieving this strong bond; if you're not careful, all your hard work can unravel before you even hit the road.
Ensure the surface is dry.
One of the most critical aspects of PPF installation is ensuring that the surface is completely dry before applying the film. After using your slip solution and squeegeeing to position the film accurately, allow ample time for any moisture to evaporate. If you rush this step and apply the film over even a slightly damp surface, you’re inviting future problems such as bubbling or lifting at the edges.
Always remember that patience pays off; waiting for that water to evaporate will help create a stronger bond with your vehicle's surface.
If necessary, use heat.
If you've ever watched an experienced installer at work, you might have noticed that they often use a heat gun when working on curved surfaces. This tool effectively activates the adhesive, enhancing its bonding power in critical areas. However, it's important to exercise caution here because too much heat can warp or damage the film itself.
A gentle wave of heat over areas like door edges or intricate curves can make a significant difference; just ensure you keep the heat source moving to prevent any hotspots.
Don't assume that what has worked for others will automatically apply to your situation, as each installation is unique. Sometimes it takes experimenting with different methods to understand what yields the best results depending on the film type and vehicle shape.
Common DIY installation errors
One of the most frequent errors during DIY PPF installation is misalignment. Getting the film perfectly aligned with the car's panels seems straightforward in theory, but many installers wrestle with proper placement once it's on the surface. Misalignment detracts from aesthetics and jeopardizes the film’s protective abilities. Before pressing down the film firmly, take a moment to double-check your positioning. It helps to visually compare each panel, ensuring everything looks straight and consistent.
Another common problem is excessive stretching of the film. While some stretching is necessary for proper coverage over curved sections of your vehicle, overstretching creates distortion and can lead to premature peeling or bubbling. Follow the manufacturer’s specific guidelines for stretching techniques; they typically provide insights on how much manipulation the film can handle without compromising its integrity. Experienced installers emphasize that gentle and deliberate movements matter greatly.
Additionally, temperature plays a critical role in achieving a successful installation.
Many enthusiasts overlook the impact of environmental conditions and fail to ensure their workspace remains within optimal temperature ranges. Installing PPF in a controlled environment between 60-80°F (15-27°C) is ideal. This temperature range enhances adhesion and allows the film to become more pliable, adhering correctly to curves and crevices. Stretching the film in a cold environment can result in poor adhesion and even cracking. Conversely, extremely high temperatures may cause glue activation too rapidly, leading to unwanted bubbles forming under the surface.
Understanding your surroundings becomes crucial; assess your work area before starting any installation process. If it’s too chilly or too hot outside, consider relocating indoors or using temporary heating or cooling solutions.
Being aware of these common mistakes can significantly improve your chances of achieving high-quality results during installation, which ultimately influences the performance and appearance of your vehicle.
Benefits of Professional Installation

Professional installers bring a wealth of expertise and precision to the Paint Protection Film (PPF) installation process that often surpasses what an average DIY approach can achieve. This experience translates into better results, meaning your vehicle is more likely to look pristine and remain protected from environmental damage.
The intricacies involved in properly applying PPF—such as aligning edges and smoothing out potential air bubbles—require a level of skill that typically comes with years of practice in the field.
Many users have reported that their vehicles not only benefited from a flawless finish through professional installations but also remained durable over time. These firsthand accounts highlight how professional services can outperform DIY efforts in both aesthetic and functional aspects.
Guarantees and warranties
One significant advantage of opting for a professional install is the guarantee and warranty that often accompany the service. Most professional installations provide assurances against peeling, bubbling, or other imperfections, giving you peace of mind.
This support can save you from costly repairs or reapplications down the line, enhancing your investment in PPF. With a warranty covering your film, you can enjoy your vehicle with confidence.
Advanced Tools and Techniques
Additionally, professionals utilize advanced tools and techniques that ensure a perfect fit and finish, addressing common mistakes more effectively than most DIY methods can. For instance, specialized cutting machines enable precise measurements tailored to your vehicle's unique contours, while professional-grade adhesives enhance bonding strength. These tools not only improve the overall appearance but also significantly contribute to the longevity of the PPF application.
Time-Saving
While pursuing a DIY route might appear cost-effective initially, consider how much time you could potentially save by opting for professional installation. Managing every step—from preparation to perfect application—can be overwhelming and time-consuming; however, leaving it to experts allows individuals to skip all those headaches.
Ultimately, professional installation ensures you can hit the road sooner without worrying about installation flaws or long-term consequences.
Investing in professional installation not only safeguards your vehicle's aesthetic appeal but also provides valuable warranties, specialized techniques, and priceless time savings—considerations that make all the difference in ensuring your PPF lasts.
In conclusion, opting for professional PPF installation not only improves the quality of protection for your vehicle, but also provides peace of mind due to the backing of warranties and expert skills.
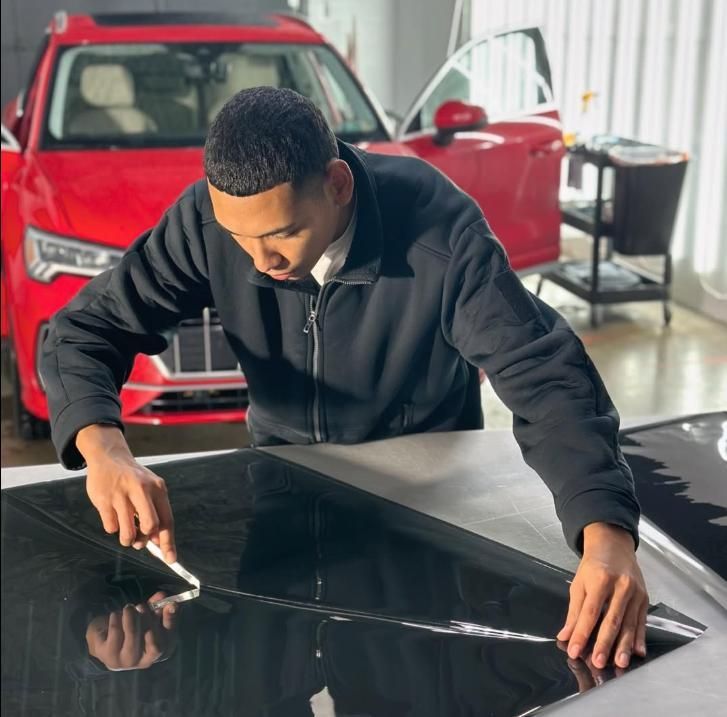
Why Choose Prestige Auto Spa & Coatings for PPF?
At Prestige Auto Spa & Coatings, we bring extensive knowledge and craftsmanship to every
paint protection film installation. We understand the value of your vehicle, and our goal is to provide protection that keeps it looking flawless. Our technicians are highly skilled in the precise application of paint protection film. We take the time to ensure perfect alignment and coverage for a seamless, bubble-free finish that blends naturally with your car’s exterior. We use only premium films, like STEK Paint Protection Films, known for their superior strength, durability, and clarity. We design these high-performance films to endure the harshest road conditions while maintaining the aesthetic appeal of your vehicle. Put your trust in the professionals at Prestige Auto Spa & Coatings for their expert PPF installation in York, PA. To schedule an appointment, Book us today.
Prestige Auto Spa & Coatings